Use code FREEDOM15 to get 15% off

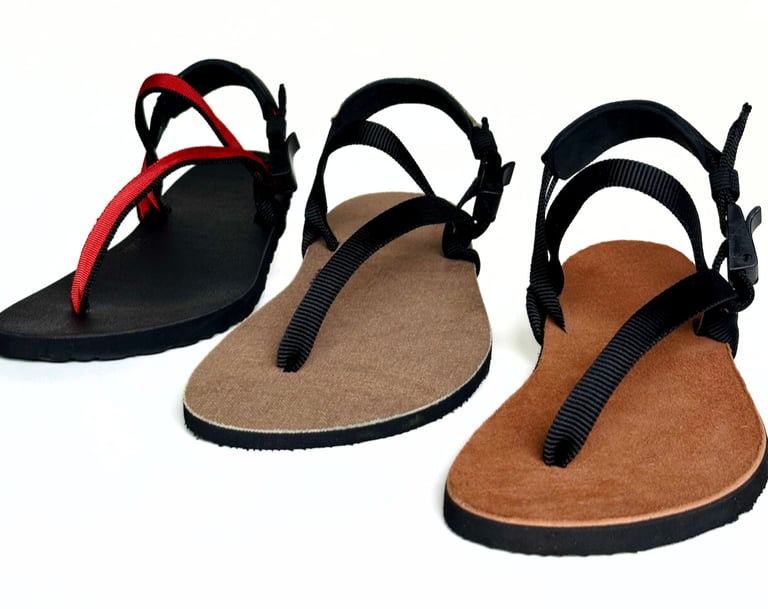
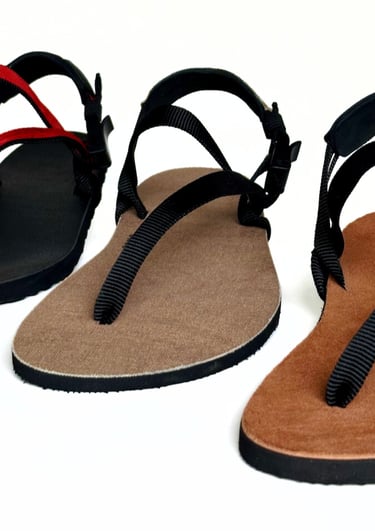
Custom Minimalist Sandals
Sandals from printable Ōdoo templates
Sandals from your foot tracing
Sizing for a Perfect Fit


For Regular Shapes
Measure your foot
Stand with your bare foot on a sheet of paper near a wall, with your heel touching the wall. Mark the longest part of your foot (big toe, second toe, or middle toe - whichever is longest), and measure this length in centimeters.
Download the size template
(Refer the sizing table given below and check your foot size against the sandal length and size template. We strongly recommend that you do this, as minimalist sandal sizes would be different from the shoe sizes that you typically go by)
Download the appropriate size template for your foot length, by clicking on the PDF link in the table below.
For example, if your foot measures 26.0 cms, your foot length would lie in the range 25.9 - 26.2 in the table. So you need to download the size template for Ōdoo Size 8.
You can also look up the sandal length column in the table to ensure you are comfortable with the extra space you would get on the sandal. If you need lesser space, go a size lower, and if you need more space, go a size higher.
Print the template
Print the PDF size template at actual size or 100% scale. (when printing a template, make sure the "scale" in the print window is set to 100% or actual size to ensure the size is accurate)
Ensure the "fit to page" checkbox is unchecked
Make sure your printer doesn’t resize or shrink to fit while printing
Verify that the template was printed correctly by comparing it's printed scale with a physical ruler or tape. The centimeter/ inch lines should match perfectly with the ones on the ruler or tape.
Larger sizes would need to be printed as a poster across two sheets of paper. You may use a software like Adobe Acrobat PDF Reader and select the "poster" setting. Print at actual size across two pages.
Check your foot against the printed template
Put the printed template on the floor, and stand barefoot on it. Ensure that your foot is centered within the template outline. Now verify that,
the heel & toes should be close to the edge, but not hanging over (a snug fit)
the toe-hole mark should be visible between the big & second toes
Again, remember to print carefully!
Avoid the most common mistake of not printing the template correctly! So double check with a ruler or a measuring tape after printing.
how to measure your feet and select the best-fitting printable size templates
Determine your Ōdoo Size when you don't have access to a printer
While verifying your foot size on a printed sizing template is advisable, and should be preferred, you could also simply measure your foot, and head over to the sizing table below to check your foot's length against the sandal's length, to choose the correct size for your Ōdoos.
(We strongly recommend that you do this, as minimalist sandal sizes would be different from the shoe sizes that you typically go by)
For example, if your foot measures 26.0 cms - you would find that your foot length lies in the range 25.9 - 26.2, for a sandal of Ōdoo Size 8, having a sandal length of 26.7 cm.
Please ensure that you are comfortable with the space your foot gets on the sandal. If you need lesser space, go a size lower, and if you need more space, go a size higher. Typically, leave less than half a cm, both in front of your toes, and behind your heel for a snug fit.
Sizing Table
For Custom Shapes
Trace your foot
Stand with your bare foot on a sheet of paper near a wall, with your heel touching the wall. Mark the longest part of your foot (big toe, second toe, or middle toe - whichever is longest), and measure this length in centimeters, and write it on the paper.
Similarly, mark the widest part of your foot, and measure this width in centimeters, and write it on the paper.
Remaining in this position, trace an outline of your foot on the same paper, with a pen. Try to remain as close to the edge of your foot as possible. Also mark the position of the toe-hole mark between the big & second toes.
In this way, you would have the length, the width, the trace, and the position of the toe-hole on this paper.
Send this information to us.
how to trace your feet to build your custom Ōdoos
Build your Ōdoos!
Directly build and order your customised pair of Ōdoos from the product catalog. Our team would confirm your requirement before shipping.


Talk to us!
Drop us a note with your requirement or call us, and our team would help you build your Ōdoos, and place an order.
Need Customised?
How to Fit your Ōdoos
your Ōdoos have three different adjustment points to ensure a snug fit


LOOSEN UP!
Begin with loosening all the 3 straps until there is enough slack to easily slip your foot through.


NOW CENTER YOUR FOOT
Now slide your foot in and center it, so that there is equal space in front of your toes and behind your heel. Ensure the toe post aligns with the gap between your big toe and second toe.
Do not worry if you don’t get it right the first time! Try walking a bit, and readjust. You would get the right fit quickly.


START WITH THE TOP-STRAP
Starting with the top-strap, tighten the slack by pulling the strap towards the heel, through the outer ankle slot. A snug fit should still allow you to slide two fingers under the strap.


NEXT, FIT THE HEEL-STRAP
Next, pull the heel-strap through the inner ankle slot. You’re good when the heel-strap is snug, staying up on its own. It should not allow your foot to slide backwards, but should allow you to slip in/ out with little effort.


ADJUST THE ANKLE-STRAP LAST...
Finally, pull the ankle-strap through the buckle and lock it, ensuring a firmness where your foot will not slide forward
1. Top Strap, 2. Heel Strap, 3. Ankle Strap & Buckle
Frequently Asked Questions
My foot sits too far back on the sandal
Loosen the top-strap by pulling it through the outer ankle slot to relieve some tension. Now tighten the heel-strap if needed, by removing some slack though the inner ankle slot towards the top.
My foot sits too far forward on the sandal
Tighten the top-strap by pulling it through the outer ankle slot towards the heel, to add some tension. Now adjust the heel-strap if needed, by adding some slack though the inner ankle slot.
My foot slides back in the sandal when I go uphill
Make sure that your strap criss-crosses as it goes through both inner & outer ankle slots. This would hold it tight, and prevent it from moving. Also ensure you have proper tension in all three adjustment points of the strap.
My heel strap slides down my heel
Ensure that all three adjustment points (top, ankle & heel) of the strap have equal tension. This balanced tension in all three points helps to hold the heel-strap in position, and also enables you to slide in and out of the sandal easily.
I have discomfort between the big toe & second toe
Hold the top-strap near the toe-post firmly. Now rotate the strap so that the folded soft side touches your skin, and relieve the discomfort. If the top-strap is too tight, loosen it a bit.
The buckle rubs against my ankle
Move the buckle closer to the outer ankle slot, and turn it slightly to make it lie on the heel-strap. This will prevent the buckle from touching your ankle bone or skin and relieve any discomfort.
The buckle doesn’t close properly
Make sure the strap passes through the buckle properly before it is clamped down. If it is still not closing properly in one attempt, try opening and closing a few times till the strap gets pressed properly.
How can I contact you?
Talk to us! Head over to the contact us page to find multiple ways to reach us.
Shipping
It usually takes us 3-5 business days to craft your Ōdoos, or 5-7 business days in case you have opted to customise. We share tracking details as soon as your order is shipped.
I don't have a printer to print the size template
No worries! While verifying the foot size on a sizing template is advisable, the next best thing would be to simply measure your foot, and head over to the sizing table to check your foot's length against the sandal's length and choose the correct size for your Ōdoos.